Table of Contents
File Import
Data Source is the place for adding new data into VDV. It supports numerous structure of data such as FTP, SFTP, Local or Network drive. Also allows for a single file or incremental files.
File Format
For each data file imported into VDV, there needs to be a File Format that matches the data file format. VDV can import almost any delimited text-based data file using the File Format editor.
To Access: Data Source -> File Format
Click the  button in the top-right corner to create a new File Format.
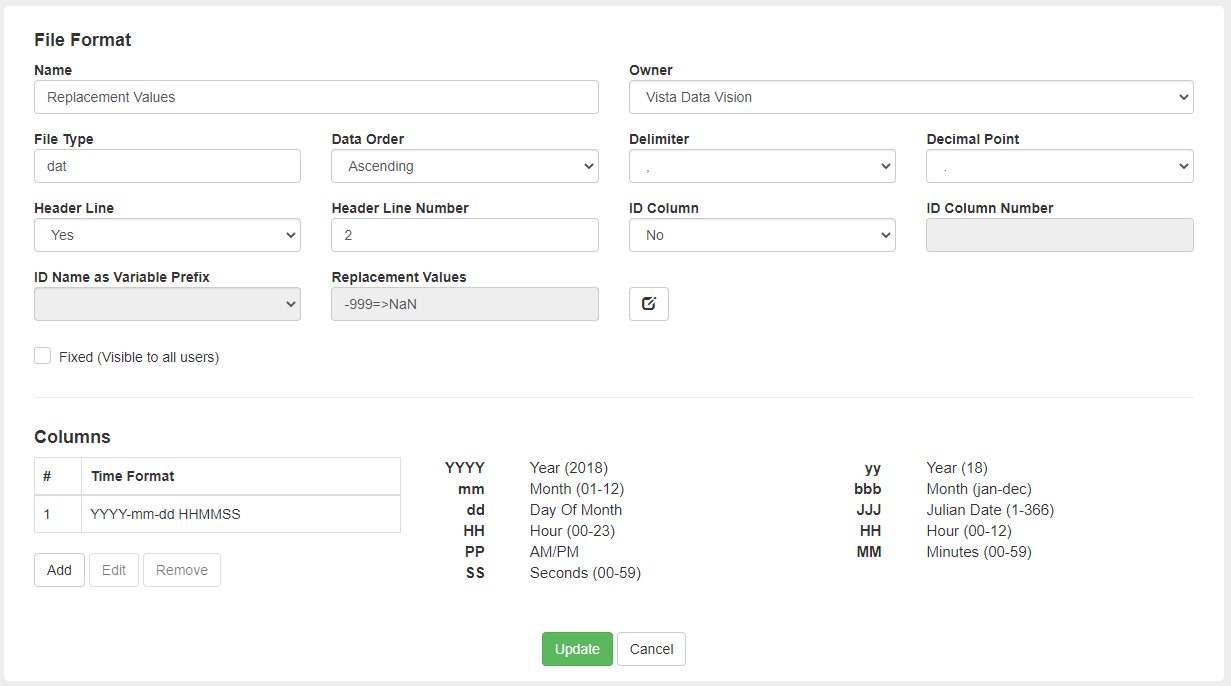
- Name: Identify the File Format with a descriptive name
- File Type: The file ending (typically csv or txt)
- Delimiter: Choose the correct Delimiter as in the file
- Decimal Point: Choose the correct Decimal point
- Owner: Choose which Owner the File Format belongs to. This is used so Users with access to specific Owners can only see File Formats that are connected to their Owners. If the File Format should be visible to all users, then select the Fixed checkbox below.
- Header Line: Select Yes if the file includes a header line with the variable name.
- Header Line Number: Select in which line the Header Line is located.
- ID Column: For Sensor-Based data files, select the column where the sensor ID number is located.
- Replacement Values: This option allows the user to assign replacement values for VDV right from the sensor.
- Time Format: Can be in one or more columns. Add columns as needed and type in the format of the Timestamp.
Sensor-Based Data Files
Create a new File Format for Sensor-Based files by setting the ID Column to Yes and setting the ID Column Number to match the data file.
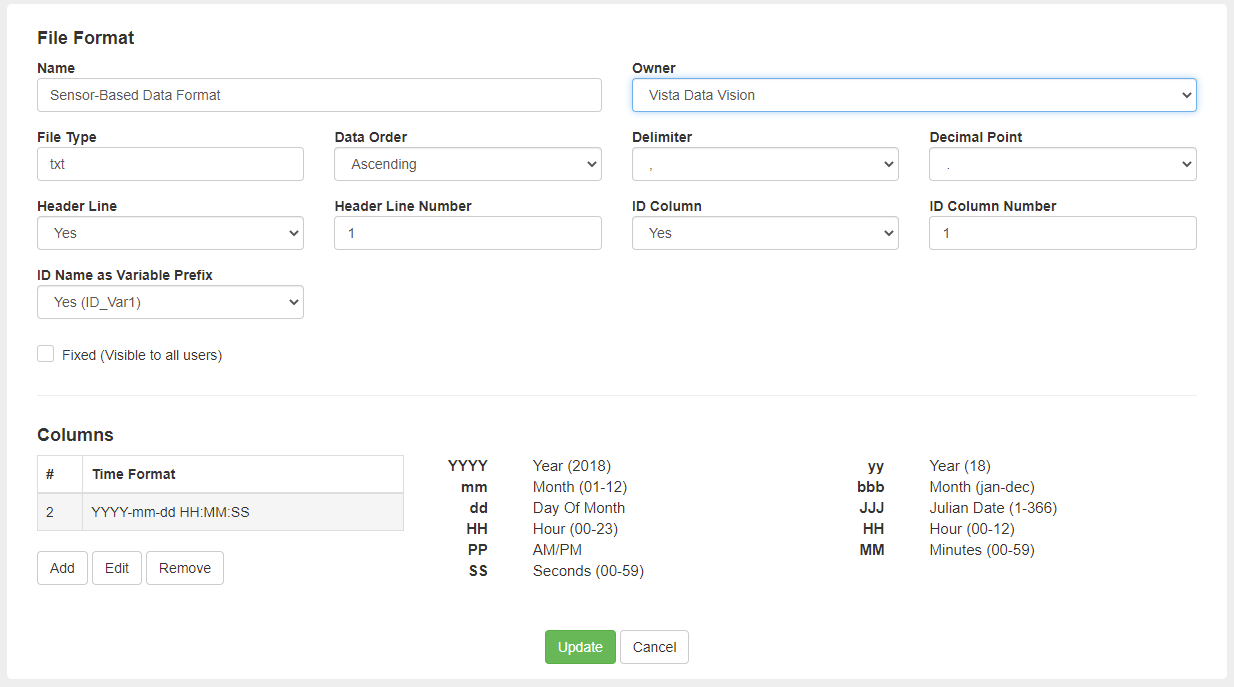
ID Name As Variable Prefix
Sensor-Based data files usually have multiple sensors, and each sensor will become a site in the VDV System. This will result in multiple sites with the same variable names. The ID Name As Variable Prefix option inserts the sensor id name as a prefix for all variables.
An example of this would be:
A file with two sensors
POINT,Timestamp,X,Y,Z
- VDV01, 2021-09-20 13:00:00, 2000.8, 5090.6, -5.6
- VDV02, 2021-09-20 13:00:00, 2000.8, 5090.6, -5.6
If the ID Name As Variable Prefix enabled will yield variable names:
- Site: VDV01
- VDV01_X
- VDV01_Y
- VDV01_Z
and,
- Site: VDV02
- VDV02_X
- VDV02_Y
- VDV02_Z
If the ID Name As Prefix is not enabled then,
Site: VDV01
- X
- Y
- Z
and,
Site: VDV02
- X
- Y
- Z
Replacement Values
Users can assign replacement values on the data imported through the Data Source. To assign replacement values, the user needs to click on the edit button next to the Replacement Values window, as seen below for both Regular and JSON format.
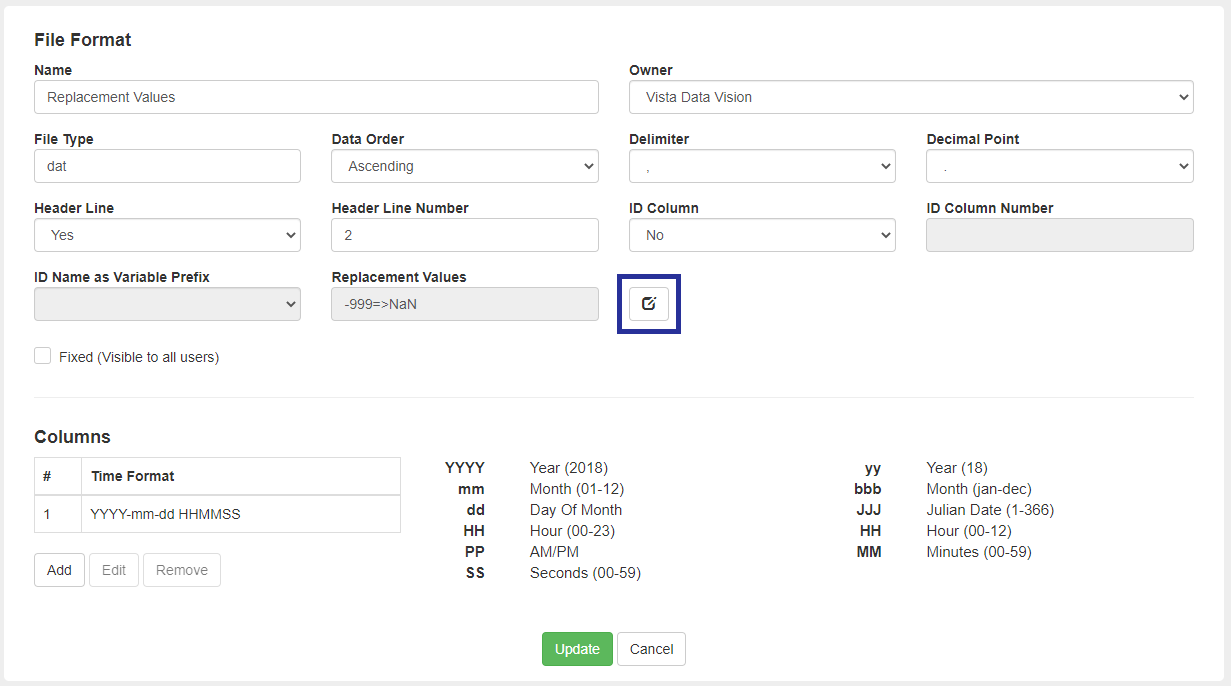
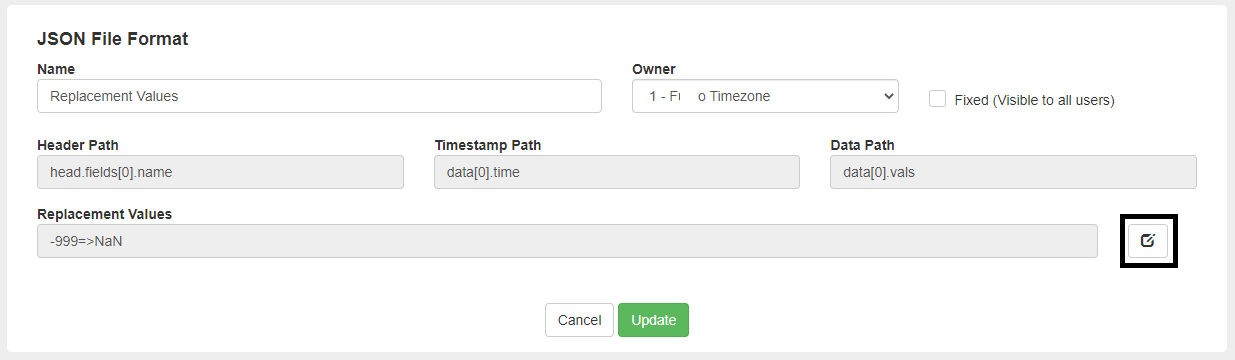
The Replacement value window will open up, allowing the user to add, remove or view the replacement values already assigned.
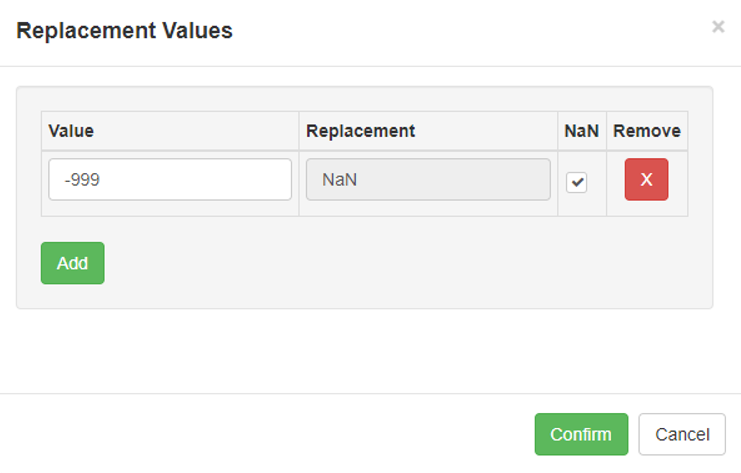
Add, edit or remove the Replacement Values and Confirm the change.
File Locations
A File Location is a predefined location where data can be imported from. It can be FTP, SFTP, Local network, or a local server.
To Access: Data Source -> File Location
Click the button in the top-right corner to create a new File Location.
Replacement Values
Users can assign replacement values on the data imported through the Data Source. The user needs to click on the edit button next to the Replacement Values window to assign replacement values.
The Replacement value overview window will open, allowing the user to add, remove or view the replacement values once already.
Select the edit button for the Replacement Value window to edit the replacement values.
Add, edit or remove the Replacement Values and Confirm the change.
Local Directory
Adding a local directory allows users to add new Data Sources from the web to the server running VDV. This can be used to add a directory where data is being collected.
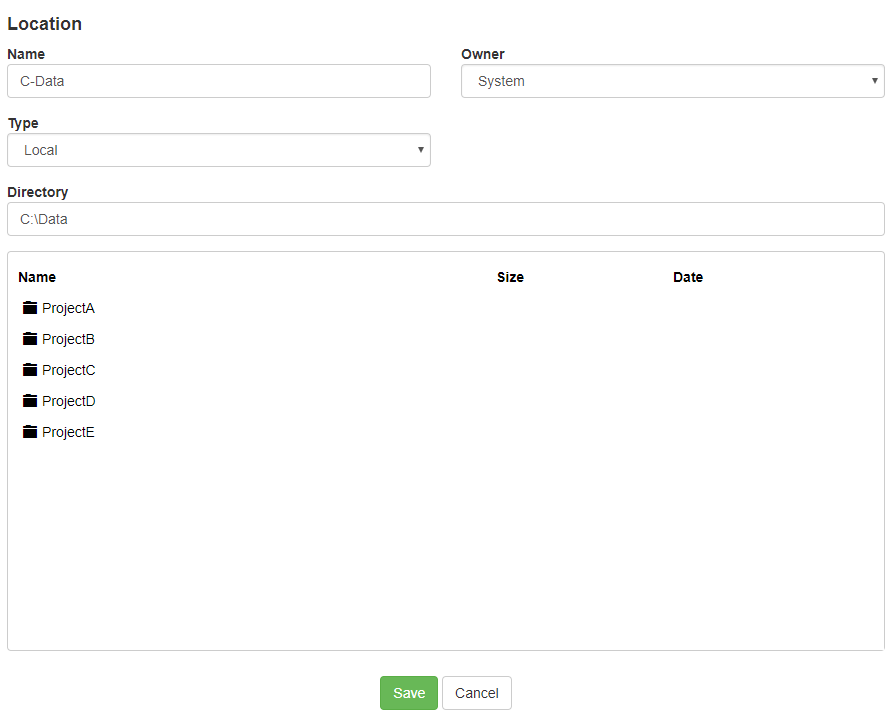
- Name: Identify the File Location with a descriptive name
- Owner: Choose which Owner the File Location belongs to. Users with access to that owner can see and use the File Location.
- Type: Choose Local.
- Directory: Type in the path to the folder containing the data files. All files and folders in that directory will be listed below.
C: or any root
C:\Windows
C:\Program Files
C:\Program Files (x86)
C:\ProgramData
C:\Windows.old
C:\Users
FTP Location
FTP Location allows users to import directly from FTP Servers. This provides data import from any external FTP/SFTP Server.
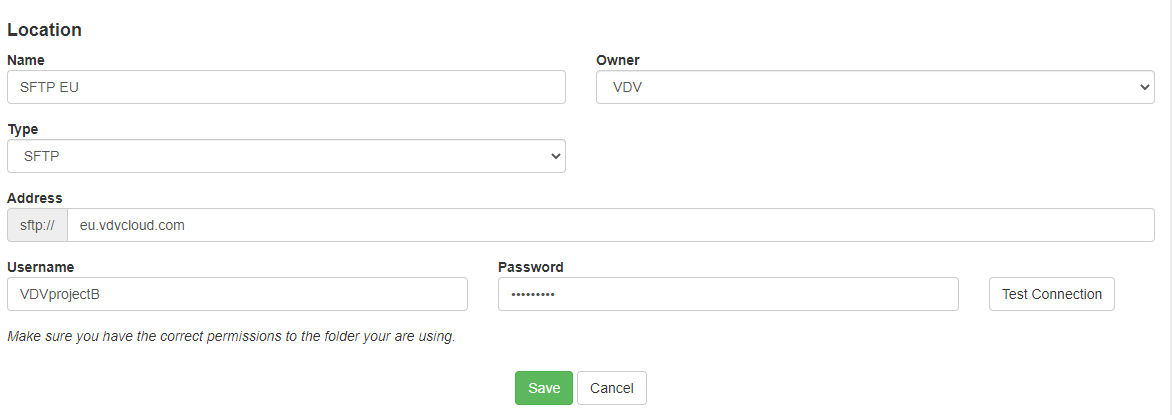
- Name: Identify the File Location with a descriptive name.
- Owner: Choose which Owner the File Location belongs to. Users with access to that owner can see and use the File Location.
- Type: Choose FTP /SFTP.
- Address: Type in the address to the FTP Server (skip the ftp://).
- Type in Username and Password.
- Click Test Connection. If everything is working, then a Success notification will appear.

File Import
To Access: Data Source -> File Import
Click the button in the top-right corner to create a new File to VDV.
Data files can either be Incremental or Single, where all data is appended to the same file.
Single File
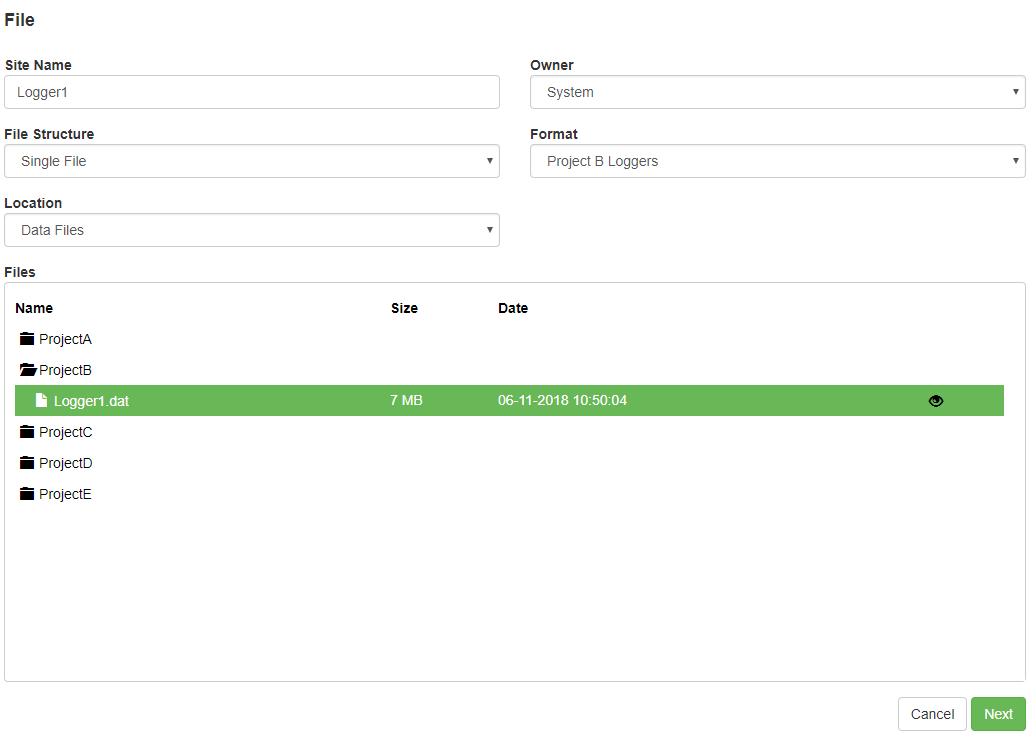
- Start with typing in the Site Name that will appear in VDV and choose the Owner of the data.
- Choose Single File in File Structure.
- Choose the correct format of the file to add.
- Choose the Location of the file.
- Open the folder and select the correct File (click on the EYE icon to see the data file content)
- Click Next
Incremental Files
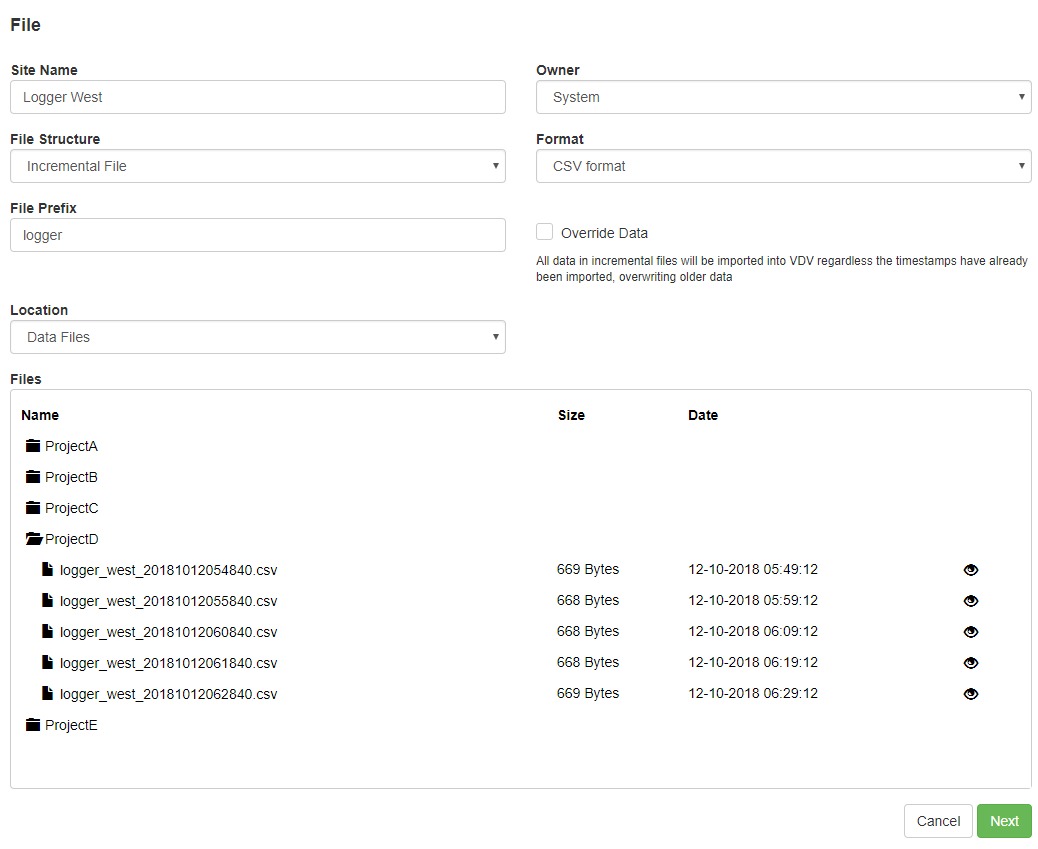
- Start with typing in the Site Name that will appear in VDV and choose the Owner of the data.
- Choose Incremental File
- Choose the correct Format of the file to add.
- Choose the Location of the file.
- Type in File Prefix (Required). The import process will only match the incremental files that match the File Prefix.
- Open the folder and select the correct File that matches the chosen File Prefix. It does not matter which file you choose; they will all be processed in the import process.
- Click on the EYE icon to see the data file content.
- Click Next.
Sensor-Based Data
VDV supports Sensor Based data files; the user must first in file format make sure that the Sensor ID number is correct for the import file.
Adding Sensor-Based File
Adding Sensor-Based File via File Import is identical to any other file. Begin by filling out the default information as with any import in VDV. If the user selects a Sensor-Based Format, the File Structure will automatically become Incremental since all Sensor-Based Files are required to be incremental.
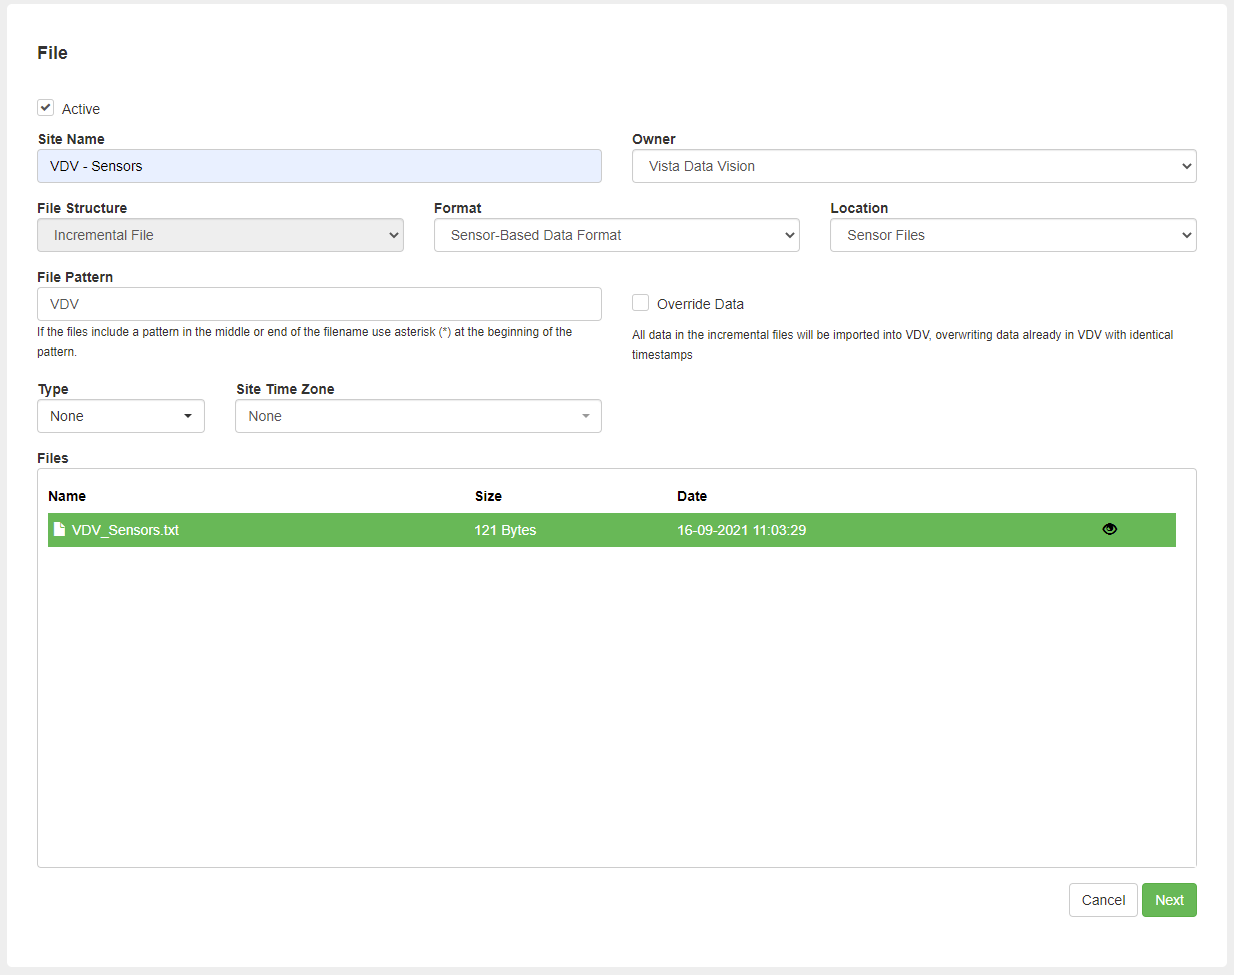
Select the File for import and click Next

Confirm that the File has been parsed correctly
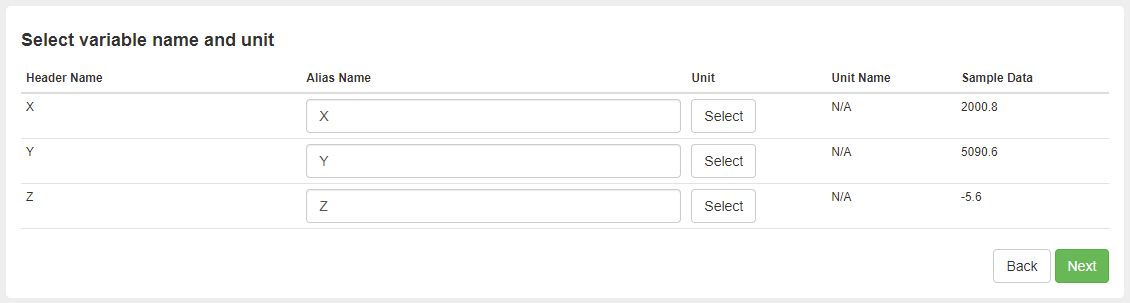
The Select variable name and unit window will be next. The only difference here is that changing a variable name will change the variable name in all the sites created from a single file.
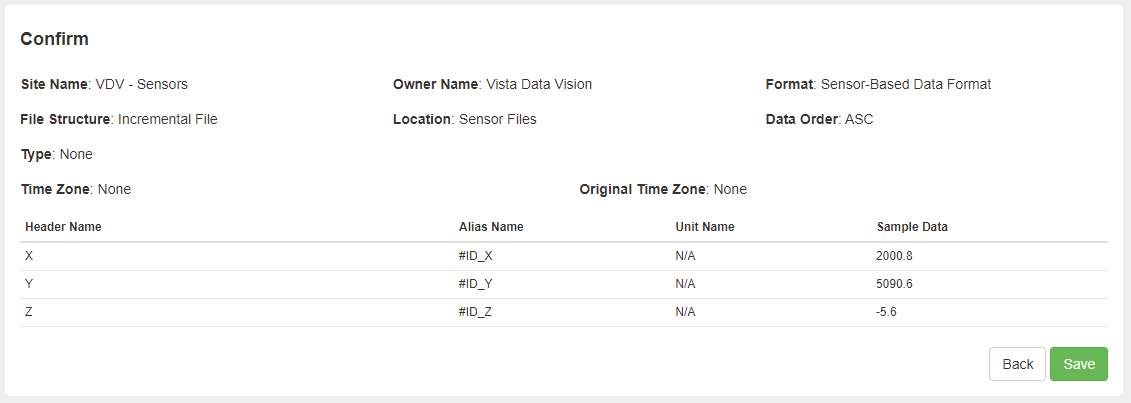
The final step displays an overview of the import you are about to create. If the File Format has the ID Name As Prefix option enabled, the Alias Name will list the #ID#_name. Otherwise, it will only be the variable name selected in the previous step.
The VDV System will begin importing data, and if a new sensor appears in the data file, VDV will automatically create a new site and import the data.
Deleting Sensor Based Data File
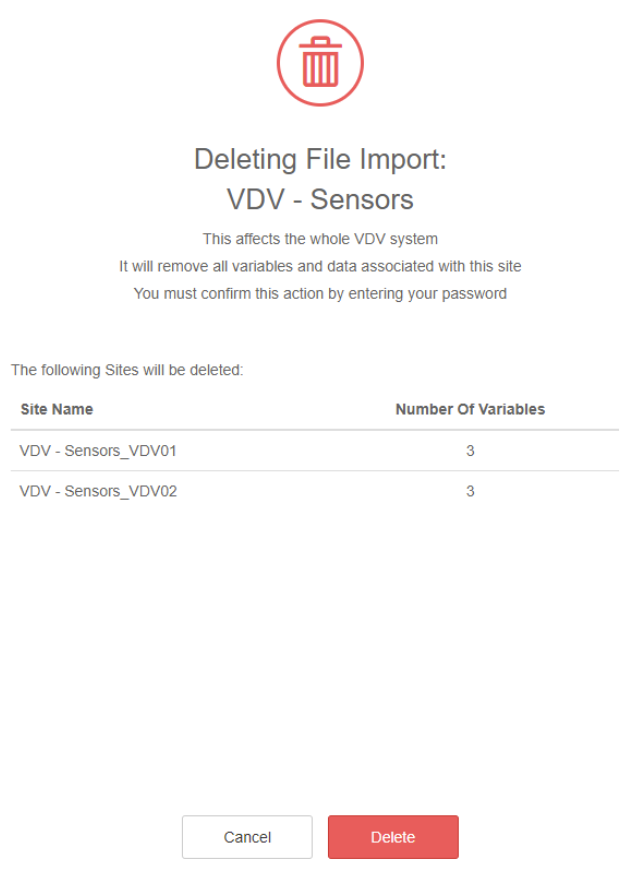
When deleting Sensor Data File, a popup will open with information about the File Import and all the sites it will remove from The VDV System
Update Header
If the file linked to a Data Source has its headers changed, an admin must update the headers of the file.
The changes can be any of the following:
- Column(s) added to the data file.
- Column(s) removed from the data file.
- Column order changed in the data file.
- Column(s) have been assigned to a new variable in the data file.
- Or any combination of the above.
To navigate to the Update Header, go to Data Source -> File Import and select the ... to open the Update header menu.

A Side by side comparison of the Current Configuration and the Latest Header will appear in the Update header menu.
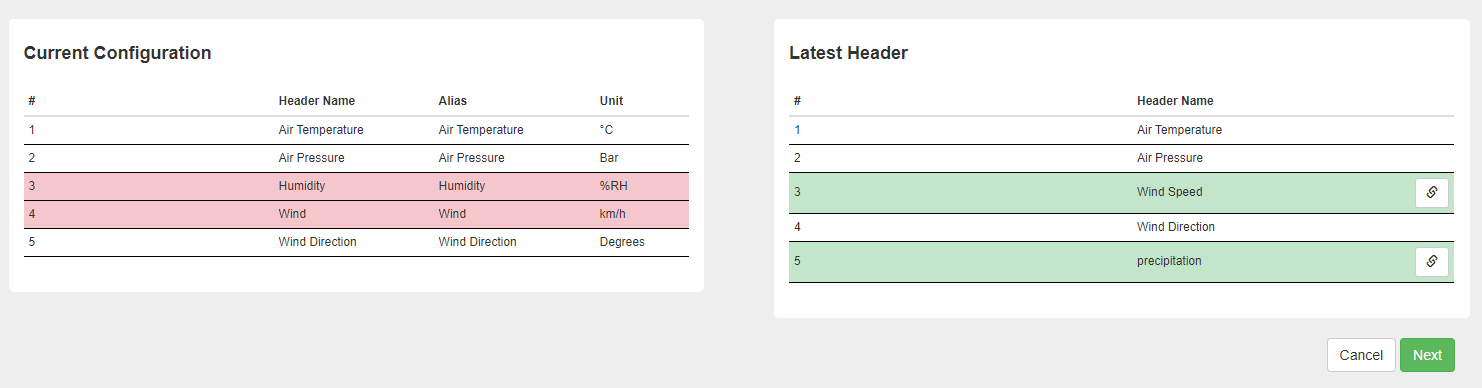
Here the Humdity column was removed, "Wind" was changed to "Wind Speed", and a new column, "precipitation", was added.
To link the Wind Speed to the old Wind column, click the link symbol and select the "#4 - Wind" column.

After linking all renamed columns, press Next.
Select a unit for all new headers and confirm that added and removed headers are correct.
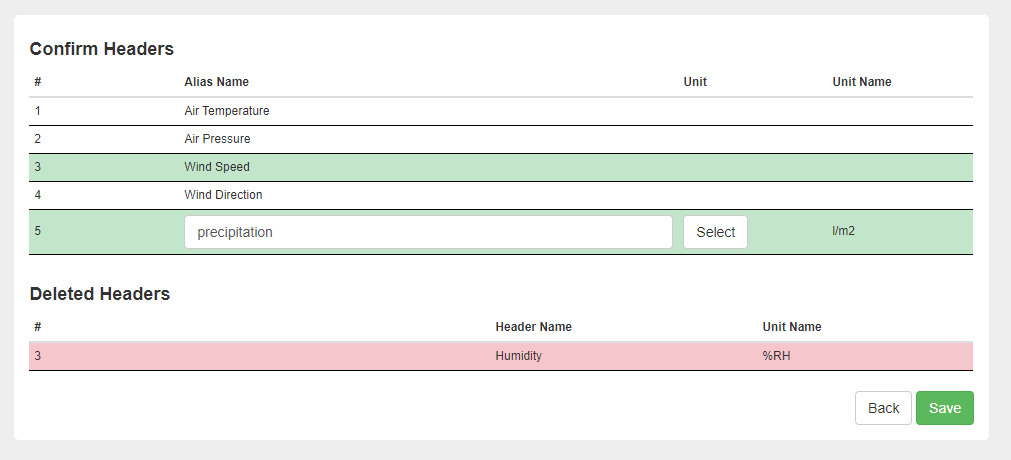
Click Save, and the updates to the headers will be made.