When moving to a new server or reinstalling after a server crash from backup, the easiest way is to copy the whole Vista Data Vision folder and VDV File Converter (If it was being used) to the exact location on a new server (not necessary to have it on the same hard-drive but preferred); then, you need to do the following:
Install Labview RunTimeEngine. Run \Vista Data Vision\LV2010-RunTimeEngine\setup.exe to install the Engine.
Install VDV Task Manager
Run C:\Vista Data Vision\setup.bat as Admin to install VDV Task Manager. Then confirm it's running by going into Task Manager -> Services and look for a service named 'VDV Task Manager'
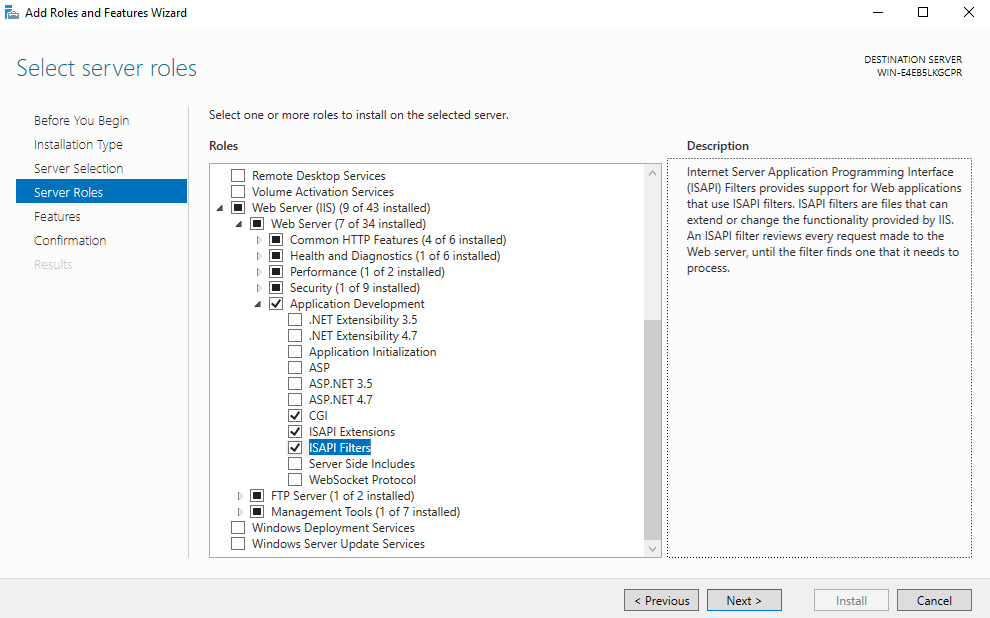
Install IIS.
To install IIS, open Server Manager, select Manage and click Add Roles and Features. Click on Next until Server Roles comes, and then check Web Server (IIS) from the list.After adding Web Server (IIS), make sure to locate Application Development and check CGI, ISAPIExtensions, and ISAPIFilters. Install the features, and the IIS services should be ready for configurations (it could be necessary to restart the server at this point).
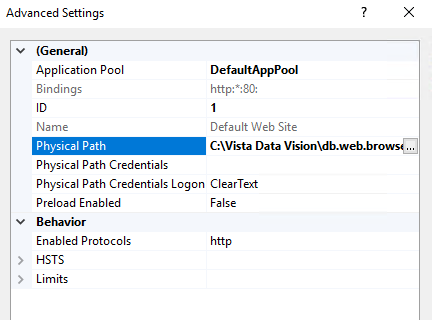
Open Control Panel > System and Security > Administrative Tools > Internet Information Services (IIS) Manager. Left click on Default Web Site -> Manage Website -> Advance Settings. Change Physical Path to "C:\Vista Data Vision\db.web.browser\vdv_www".
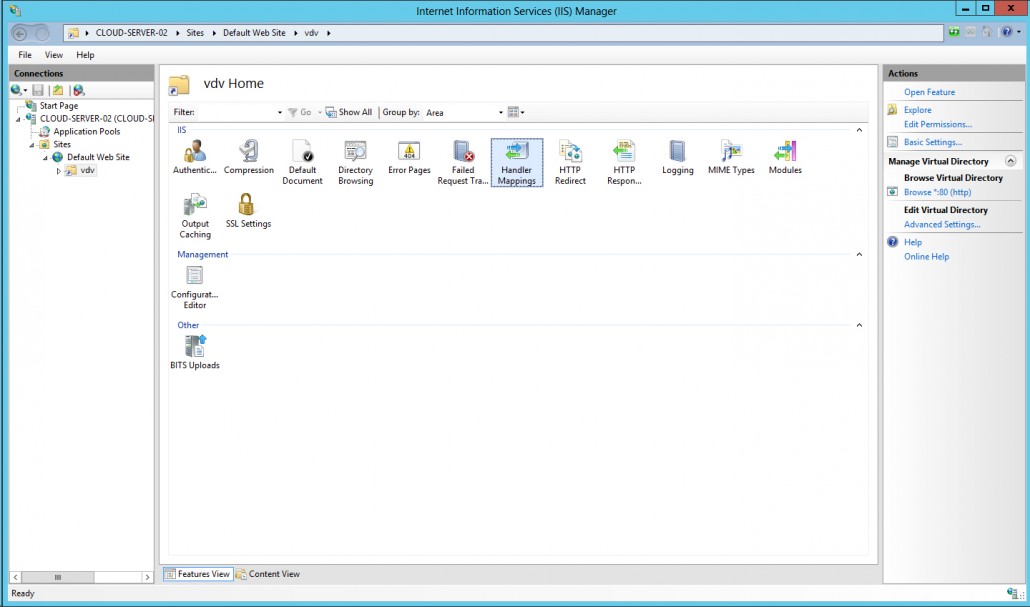
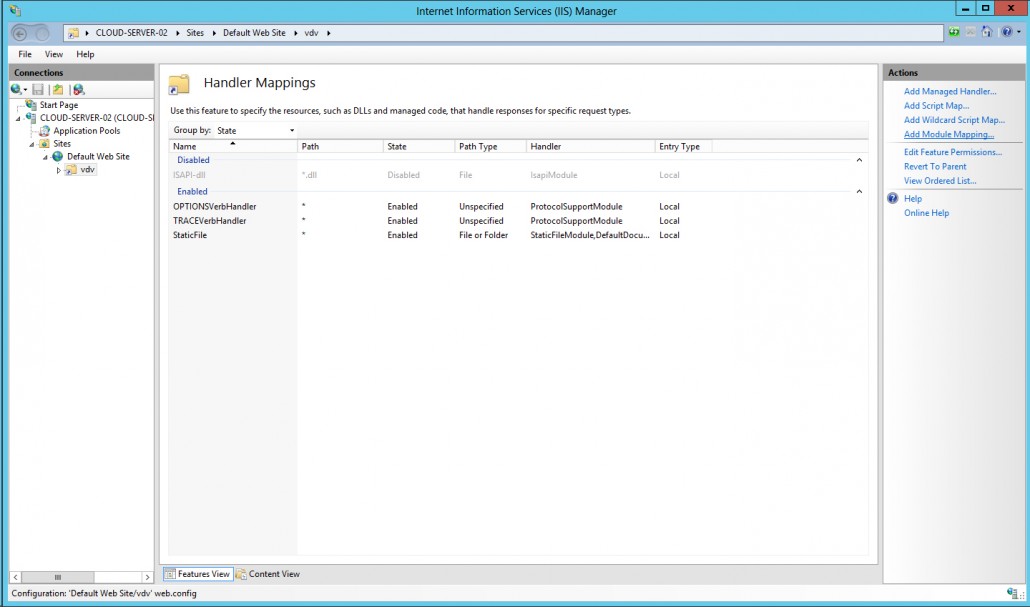
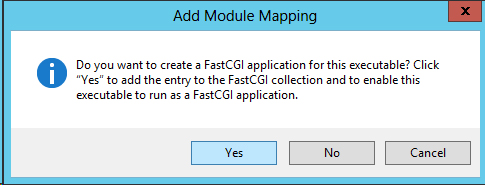
Select Default Web Site and double click on Handler Mappings.Click on Add Module Mapping... in the top right corner. Select FastCgiModule from the Module drop-down list. It may be necessary to type " around the Executable path.When selecting the "Executable (optional)", make sure that you select (*.exe) in the bottom right corner and php-cgi (default location is C:\Vista Data Vision\db.web.browser\php7\php-cgi.exe for PHP-7, or C:\Vista Data Vision\db.web.browser\php-8.1.14\php-cgi.exe for php-8.1.14 (PHP8 is recommended).Enter PHP8 for Name. Press OK to finish.Click Yes to allow PHP.
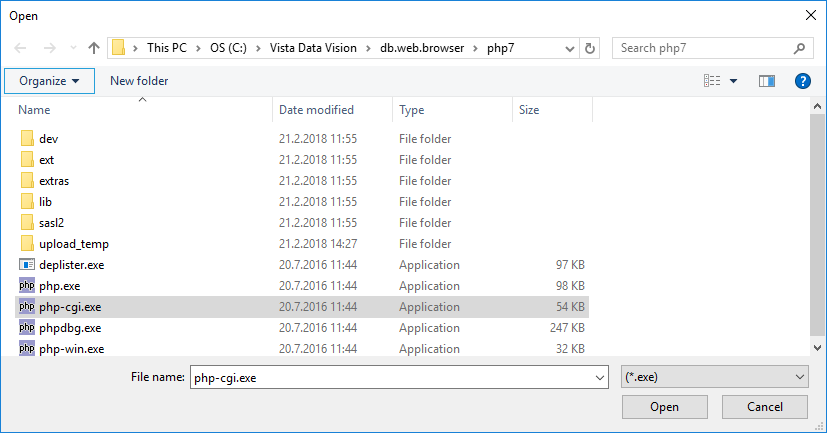
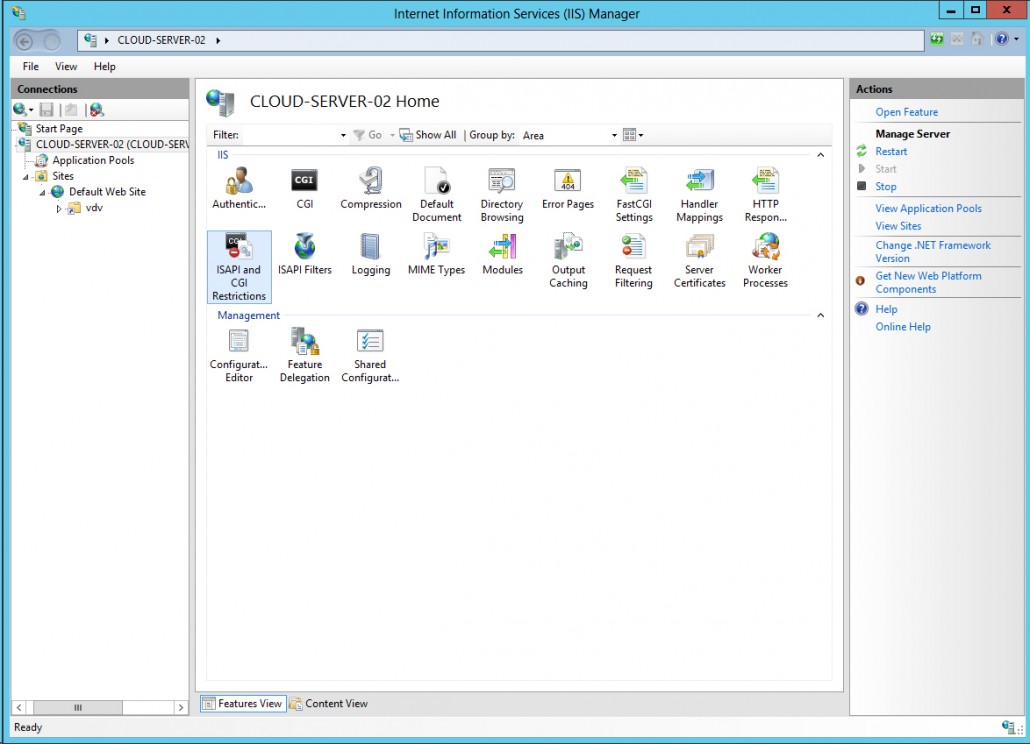
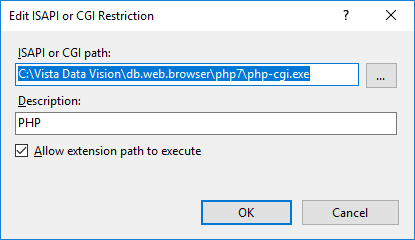
Select the topnode in the Connections list (the server name). Double click on ISAPI and CGIRestrictions.If php.exe has not been added to the list, it will need to be added manually. For adding PHP manually, click Add... in the top right corner.Browse to php-cgi.exe for ISAPI or CGIpath (default location is C:\VistaData Vision\db.web.browser\PHP7\php-cgi.exe for PHP-7 or C:\Vista Data Vision\db.web.browser\php7.4.24.php-cgi.exe for PHP-7.4.24). Select (*.exe) in the bottom right corner when locating "php-cgi.exe". Press OK to finish.
Open a web browser on the server and type http://localhost in the address field.
If VDV is not installed on the same drive on the new Server
Change must be made to the "\Vista Data Vision\db.web.browser\php-8.1.14\php.ini" for php-8.1.14 or"\Vista Data Vision\db.web.browser\php7\php.ini" for PHP-7.
Find the following line: "upload_tmp_dir".
Change it to the absolute path of the installation folder of VDV. For example, if VDV is installed on the D-drive you would change the line to: upload_tmp_dir = "D:\Vista Data Vision\db.web.browser\php-8.1.14\upload_temp".
Test the PHP
Note: If you want to see if PHP has been installed correctly, create an info.php file and store it in \Vista Data Vision\db.web.browser\vdv_www folder. info.php file is just a text file and may be created using Notepad. The file should only contain the following PHP code: <?php phpinfo() ?>
Open a Web Browser and type inhttp://localhost/vdv/info.php. You should see an information page on PHP. If you do not see this page, check that you correctly performed the steps above.
After the PHP test, then delete the info.php file.
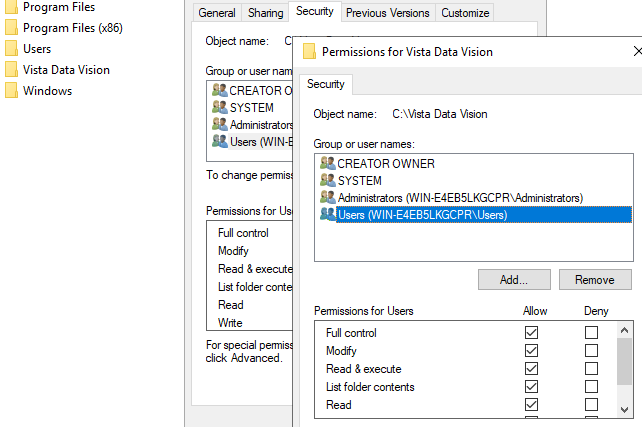
Allow Users the Full Control permission on the Vista Data Vision folder (default is C:\Vista Data Vision\db.web.browser\php-8.1.14\php-cgi.exe for php-8.1.14 and C:\Vista Data Vision\db.web.browser\php7\php-cgi.exe for PHP-7)
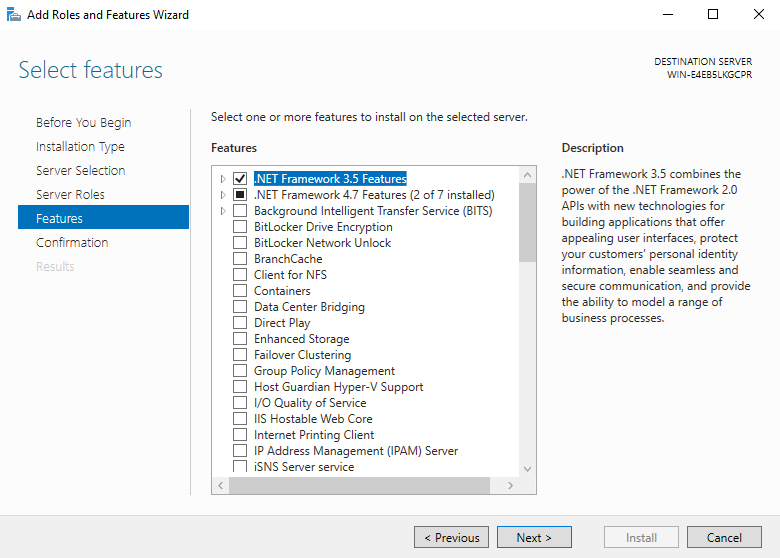
Open Server Manager -> Manage -> Add Roles and Features.
Select .NET 3.5 from Feature list.
Press Install.
The next step is to register VDV.
Open C:\Vista Data Vision\db.robot.c\db.robot.c.exe as an Administrator.
Register db.robot.c by going to Help->Register Product.
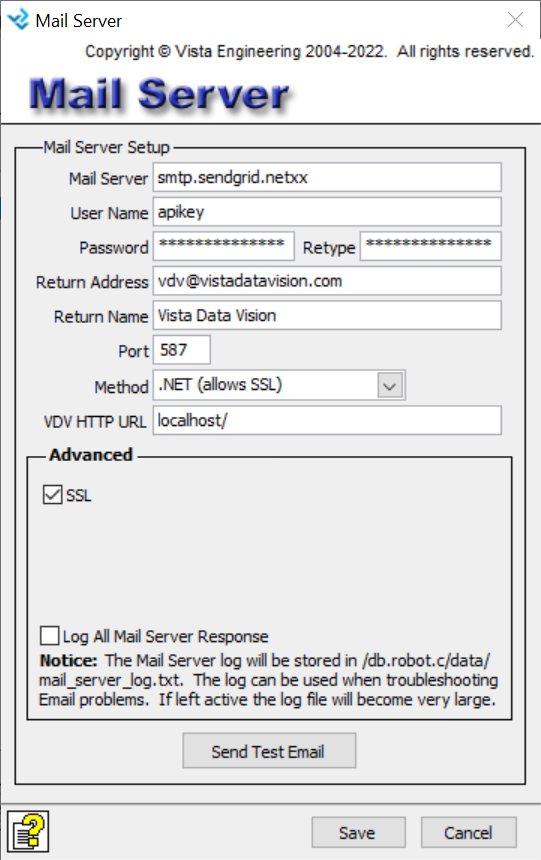
Disable the mail server (db.robot.c > Edit > Mail Server Setup and add, for example, xx to the end of the mail server) while you configure this server so you will not send out a double set of Alarms if Vista Data Vision is still running on the old server:
Ensure that VDV has access to all the data sources if the system's location was changed. Each Site in db.robot.c needs to be edited and point to the new location.
 Updated
by Ólafur Haukur Pétursson
Updated
by Ólafur Haukur Pétursson