Table of Contents
Custom Alarms
Updated
by Ragnar Tryggvason
Custom Alarm
The Custom Alarm function in VDV lets you configure an alarm to be given if the average, the rate of change, or the sum of a variable over a chosen period exceeds, is equal to or lower than the alarm limit set or if the latest value is higher, lower or equal to the set limit.
You can set up a new custom alarm by clicking Alarm > Custom Alarm > New.
- Choose your Variable by clicking the +Variable Button
- Choose whether you want your alarm to be triggered by a value higher, lower than or equal to your alarm limit.

- Choose your alarm limit.

- Choose whether you would like your alarm to be triggered by the latest recorded value or the average, sum or rate of change over a chosen number of hours.
If Rate of Change is chosen: Check "Absolute Value" if you would like your alarm to be triggered only for a positive ROC value.

- Give your Custom Alarm a name.
- Choose the contact group which will receive the alarm messages.
- Alarm messages will be sent and repeated until the alarm is confirmed. Choose the number of minutes you would like to pass between repetitions.
- VDV sets up a default message based on your configurations. It is possible to customize the message using the following merge fields:
$ALARM_NAME$ | $ON/OFF$ |
$SITE_NAME$ | $NOW$ |
$TIMESTAMP$ | $VALUE$ |
$LIMIT_VALUE$ | $VARIABLE_NAME$ |
- Include an optional description. The description will not be included in the alarm message.
- Check "Monitor" to turn on your Custom Alarm and start monitoring your chosen variable.
Multi-Condition Alarm
With this feature, it's possible to configure alarms with multiple alarm conditions separated by the conditional operators, AND and OR. If the equation evaluates to true, the alarm will be triggered.
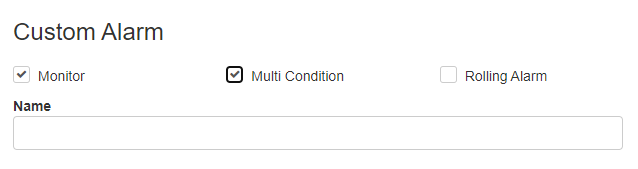
- To set up a new multi-condition alarm, select Setup -> Custom Alarm and select the plus icon on the top right corner of the screen.
- Click the Multi Condition checkbox in the upper right corner; this will change the view in the browser window.
- Now click the plus icon in the center of the screen, adding a new condition.


- When a condition has been created, it's possible to select a variable by clicking the "Select Variable" button in the condition, which will open the default VDV Variable Selector. It's also possible to change the arithmetic operators by clicking the operator; available operators are <, =, >. Finally, adjust the alarm limit for that condition before creating a new one.

- Add a new alarm condition by clicking on the plus button again or by hovering over an existing condition; two more plus buttons will appear on the left and right sides of that condition. By clicking on either of those, a new alarm condition will be added before or after that condition. Using this method allows conditions to be added in-between a large set of conditions.

- A conditional operator separates the two conditions when the second condition has been added. Click the operator (default AND) to change it.

- Repeat steps 3 through 6 to add all the conditions needed for the alarm.

- To remove a condition from the alarm, Ctrl-Click the condition (it will change to color green) and click the button with the trash bin, which will remove the selected condition. One or more conditions can be removed at once.
Note: By selecting two conditions that are not next to one another, all conditions between them will be selected
- By adding parentheses, the order of operations can be modified. Ctrl-Click the conditions and click the button with the "(X)" label, and that will wrap the selected conditions in parentheses.

- Finally, give the alarm a name, select a contact group, adjust the delay, or repeat if needed. Also, change the alarm email template if required and Save.
Rolling Alarm
This feature makes it possible to configure a rolling alarm with both single or multiple conditions separated by conditional operators, AND and OR. The alarm threshold will be triggered if the equation evaluates to true for the selected period.
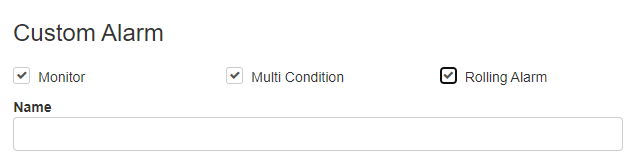
- To set up a new rolling alarm, select Setup -> Custom Alarm and select the plus icon on the top right corner of the screen.
- Click the Multi Condition checkbox in the upper right corner, and the rolling alarm checkbox will appear, click the Rolling Alarm checkbox, which will change the view in the browser window.
- Now click the plus icon in the center of the screen, adding a new condition.
- When a condition has been created, it's possible to select a variable by clicking the "Select Variable" button on the condition, which will open the default VDV Variable Selector. It's also possible to change the arithmetic operators by clicking the operator; available operators are <, =, >. Finally, adjust the alarm limit for that condition before creating a new one.
- Add a new alarm condition by clicking on the plus button again, or when hovering over a condition, two more plus buttons will appear on the left and right sides of that condition. By clicking on either of those, a new alarm condition will be added before or after that condition. Using this method allows conditions to be added in-between a large set of conditions.
- A conditional operator separates the two conditions when the second condition has been added. Click the operator (default AND) to change it.
- Repeat steps 3 through 6 to add all the conditions needed for the alarm.
- To remove a condition from the alarm Ctrl-Click the condition (it will change to color green) and click the button with the trash bin, removing the selected condition. One or more conditions can be removed at once.
Note: By selecting two conditions that are not next to one another, all conditions between them will be selected - By adding parentheses, the order of operations can be modified. Ctrl-Click the conditions and click the button with the "(X)" label, and that will wrap the selected conditions in parentheses.
- Now enter the period into rolling hours and the number of hours that would exceed the threshold for an alarm to be triggered into exceedance.

- Finally, give the alarm a name, select a contact group, adjust the delay, or repeat if needed. Also, change the alarm email template if required and Save.